
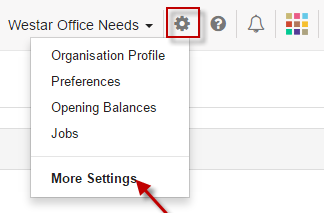
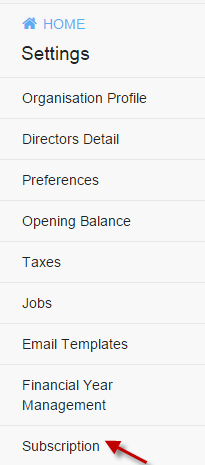
Settings
Set your Organisation Profile, Preferences, Opening Balances, Email Templates, and Subscription and access other Settings option.
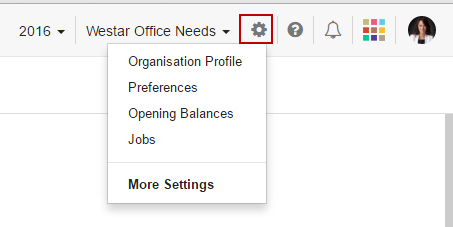
You may have provided the basic information of your organization in the Quick Setup, now you can do a complete setup of your organization from the Settings tab.
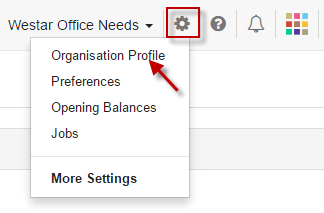
Organisation Profile
To set up your organisation profile, click Organisation Profile option from  Settings icon.
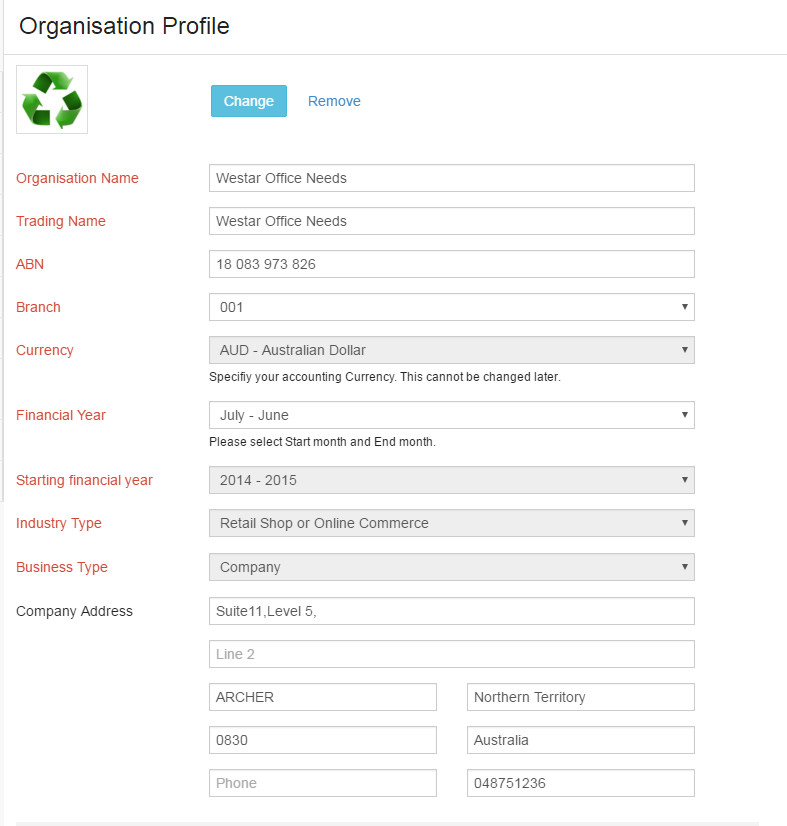
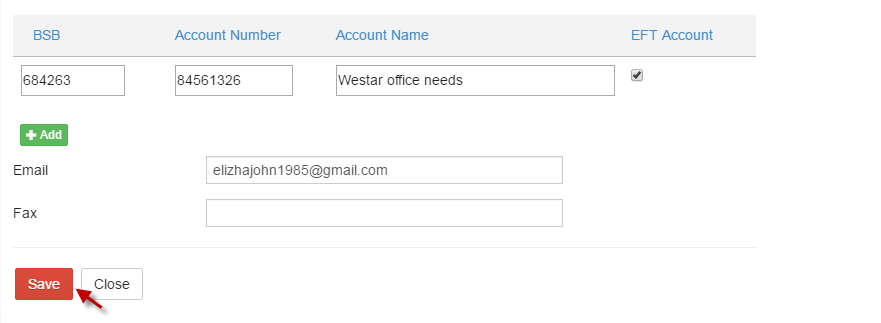
Update the profile information and click Save.
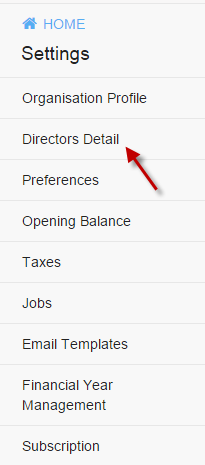
Directors Detail
Select More Settings from the dropdown menu of the Settings icon and click Directors Detail. Based on the Business type selection, the authorized person's name will be changed.
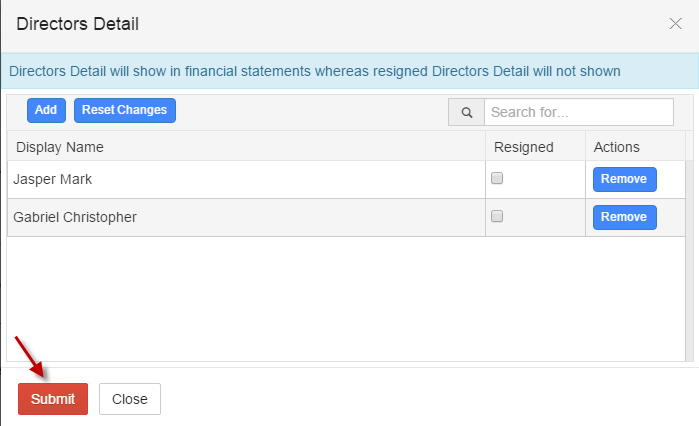
Enter the authorized person's name and choose Add for the addition of more persons and click Submit. These details will be shown in financial Statements and those members with Resigned (tick the checkbox to resign the member) will not be shown in financial statement for signature.
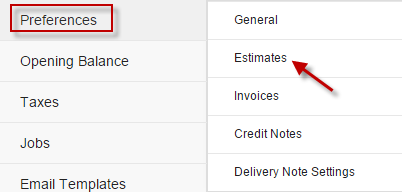
Preferences
Configure your Settings through Preferences section.
-
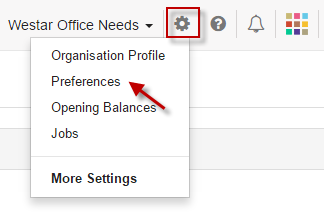
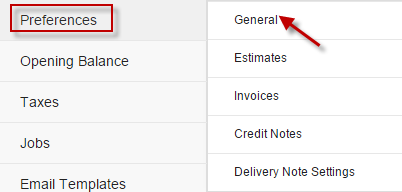
Option 1: Go to Settings icon and select Preferences with quick view.
-
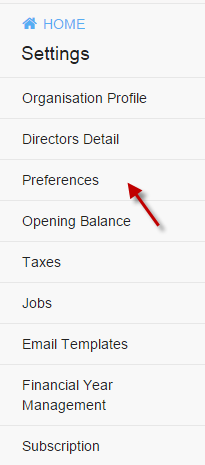
Option 2: Go to Settings icon and select Preferences.
-
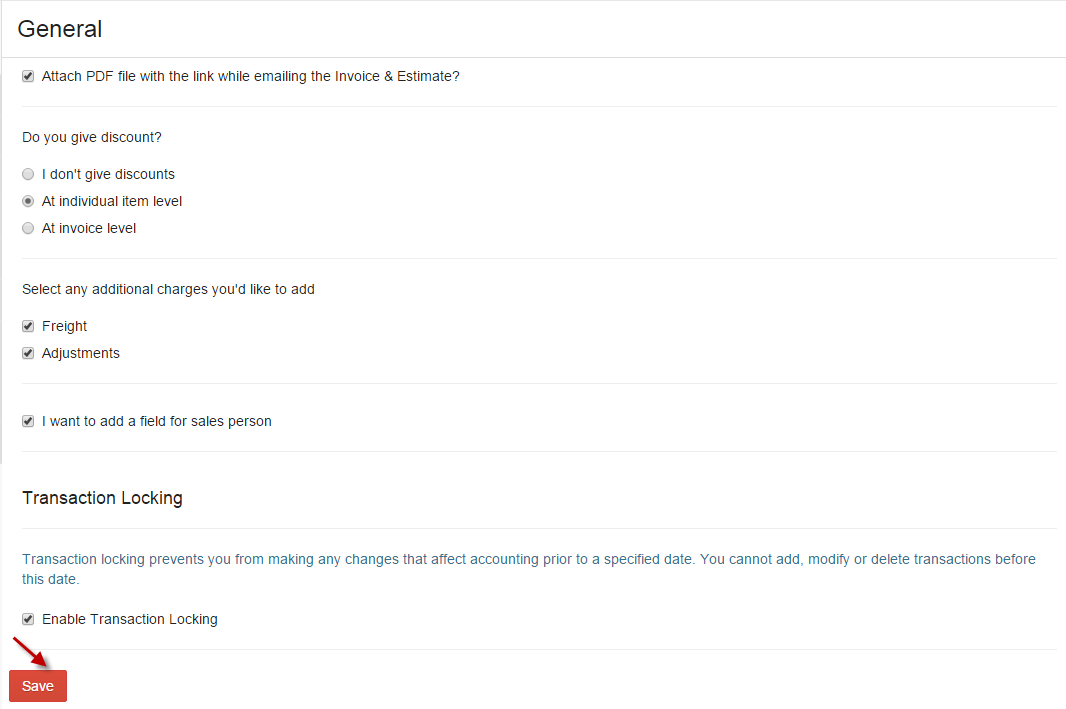
A. General
Through the General Settings, you can customize account by selecting your preferences for the various options provided below.
-
i. Attach PDF file with the link while emailing the invoice & estimate?
Tick this option if you wish to attach a PDF copy of your invoice & estimate while emailing, leave it unchecked if you wish not to include the PDF file.
-
ii. Do you give discounts?
If you offer discounts to your customers, choose whether you offer discount At Individual Item level or At invoice level. If you do not offer any discounts, choose I don't give discounts.
-
iii. Select any additional charges you'll like to add
If you wish to add charges related to shipping in the sales modules, check the Shipping Charges option. If there are any other adjustments you like to add, check on the Adjustments option. Leave them unchecked if you wish not to add any.
-
iv. I want to add a field for sales person
If you want to add a sales person choose this option.
-
v. Transaction Locking
Transaction locking prevents you from making any changes that affect accounting prior to a specified date. You cannot add, modify or delete transactions before this date.
-
i. Attach PDF file with the link while emailing the invoice & estimate?
-
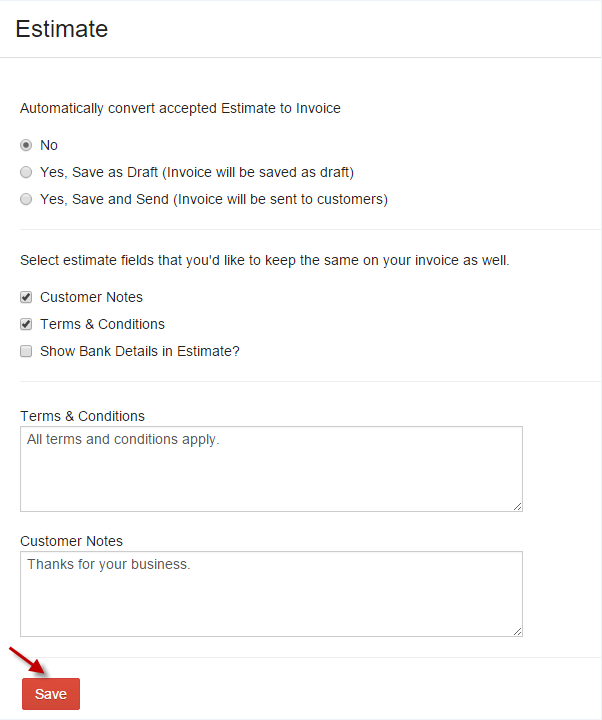
B. Estimates
Configure preferences related to the Estimates module.
-
i. Automatically convert accepted Estimate to Invoice
- No: On Choosing this option will not convert the accepted estimate to an invoice.
- Yes, Save as Draft: Choosing this option will convert the accepted estimate to an invoice and save it in draft state.
- Yes, Save and Send: Choosing this option will convert the accepted estimate to an invoice and will be sent to the customers directly.
-
ii. Select estimate fields that you'd like to keep the same on your invoice as well
Add Customer Notes to your estimates and the corresponding invoice by checking the option. Automate the Terms & Conditions to be displayed in the estimates and the corresponding invoices by checking the option.
-
iii. Terms& Conditions
Enter the terms and conditions of your business to be displayed in your estimates. This will be displayed in all the estimates created unless otherwise you change the content at the time of creating the estimate.
-
i. Automatically convert accepted Estimate to Invoice
-
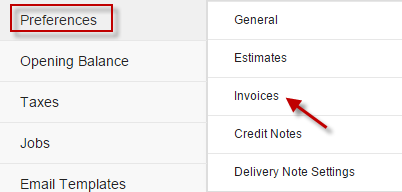
C. Invoices
Configure preferences related to the Invoices module.
-
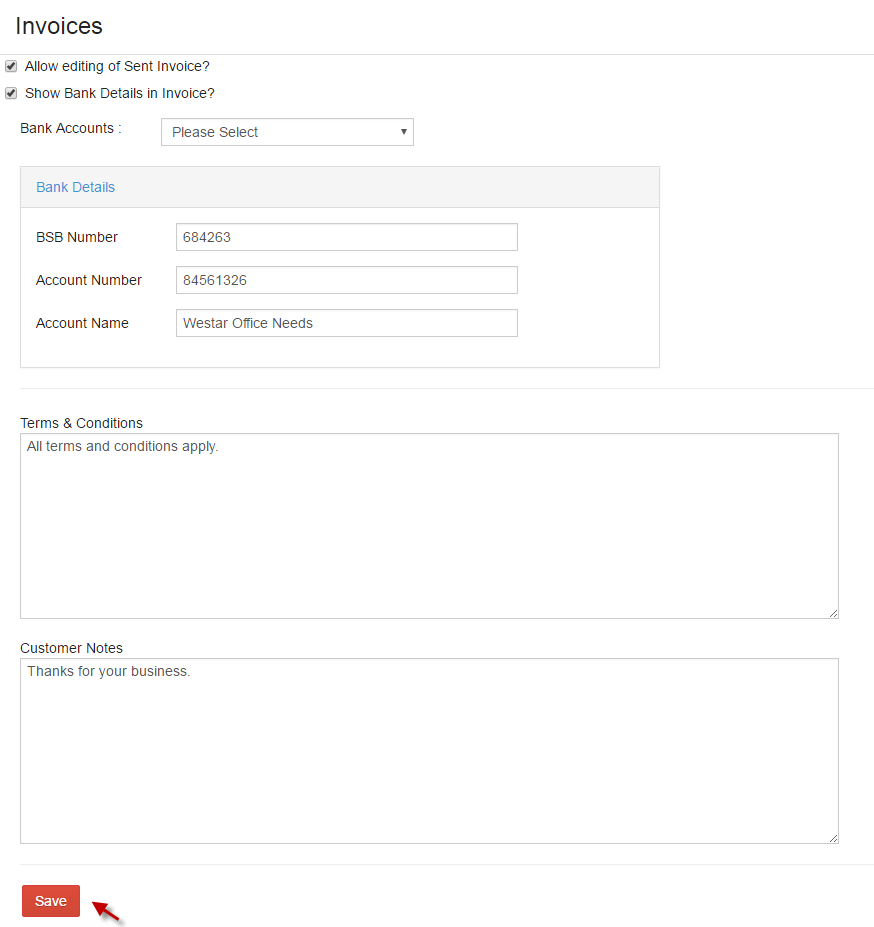
i. Allow Editing of Invoice
Enable this option if you wish to allow edit the invoice details.
-
ii. Show Bank Details in Invoice
Enable this option if you wish to add bank details such as BSB number, Account number and account name in your invoice.
-
iii. Terms & conditions and Customer Notes
The given details by default will be prefilled while creating invoices. This will be displayed in all the invoices created unless otherwise you change the content at the time of creating the invoice.
-
i. Allow Editing of Invoice
-
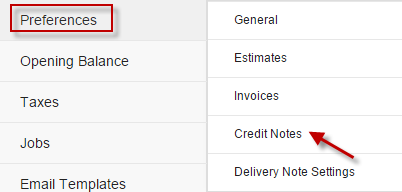
D. Credit Notes
Configure preferences related to the Credit Notes.
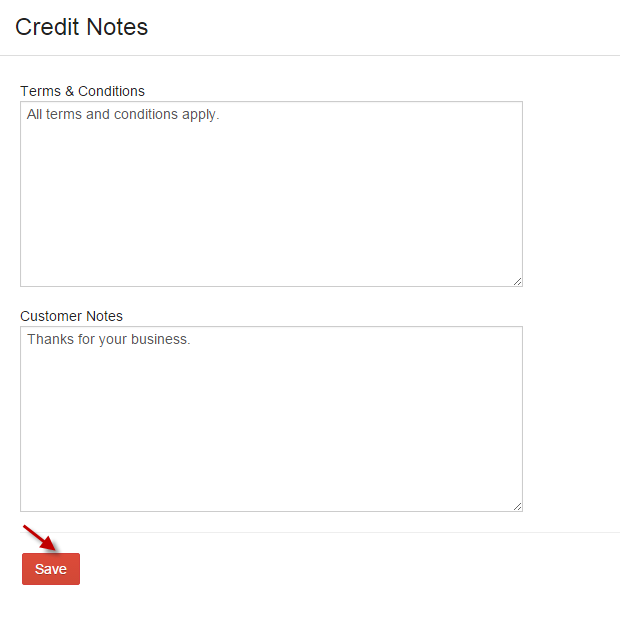
Terms & Conditions and Customer Notes
Enter the terms & conditions and customer notes of your business to be displayed in your credit notes. This will be displayed in all the credit notes created unless otherwise you change the content at the time of creating the credit note.
-
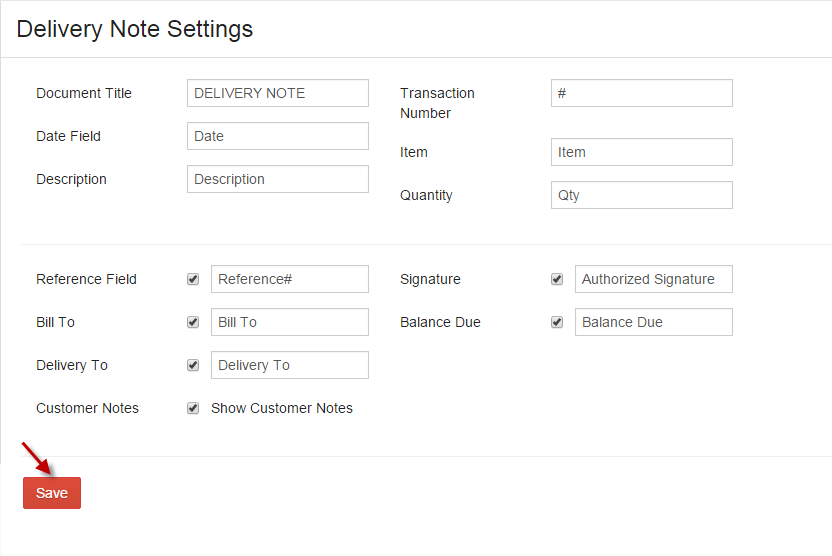
E. Delivery Note Settings
If you ship or deliver the products you sell to your customers, then you can configure your Delivery Note settings here. A Delivery Note lists the contents of the package, what the recipient has ordered and what has been sent to them. Typically, a Delivery Note includes description and quantity of the items delivered. In some cases, a copy of the Delivery Note is signed by the recipient and then returned to the seller or consignor as a proof that the items have been delivered.
Configure preferences related to the Deliver Notes.
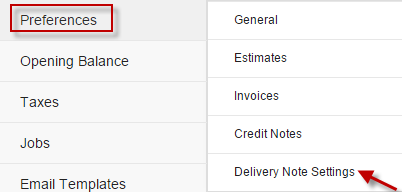
Make necessary settings can click Save.
-
A. General
Opening Balance
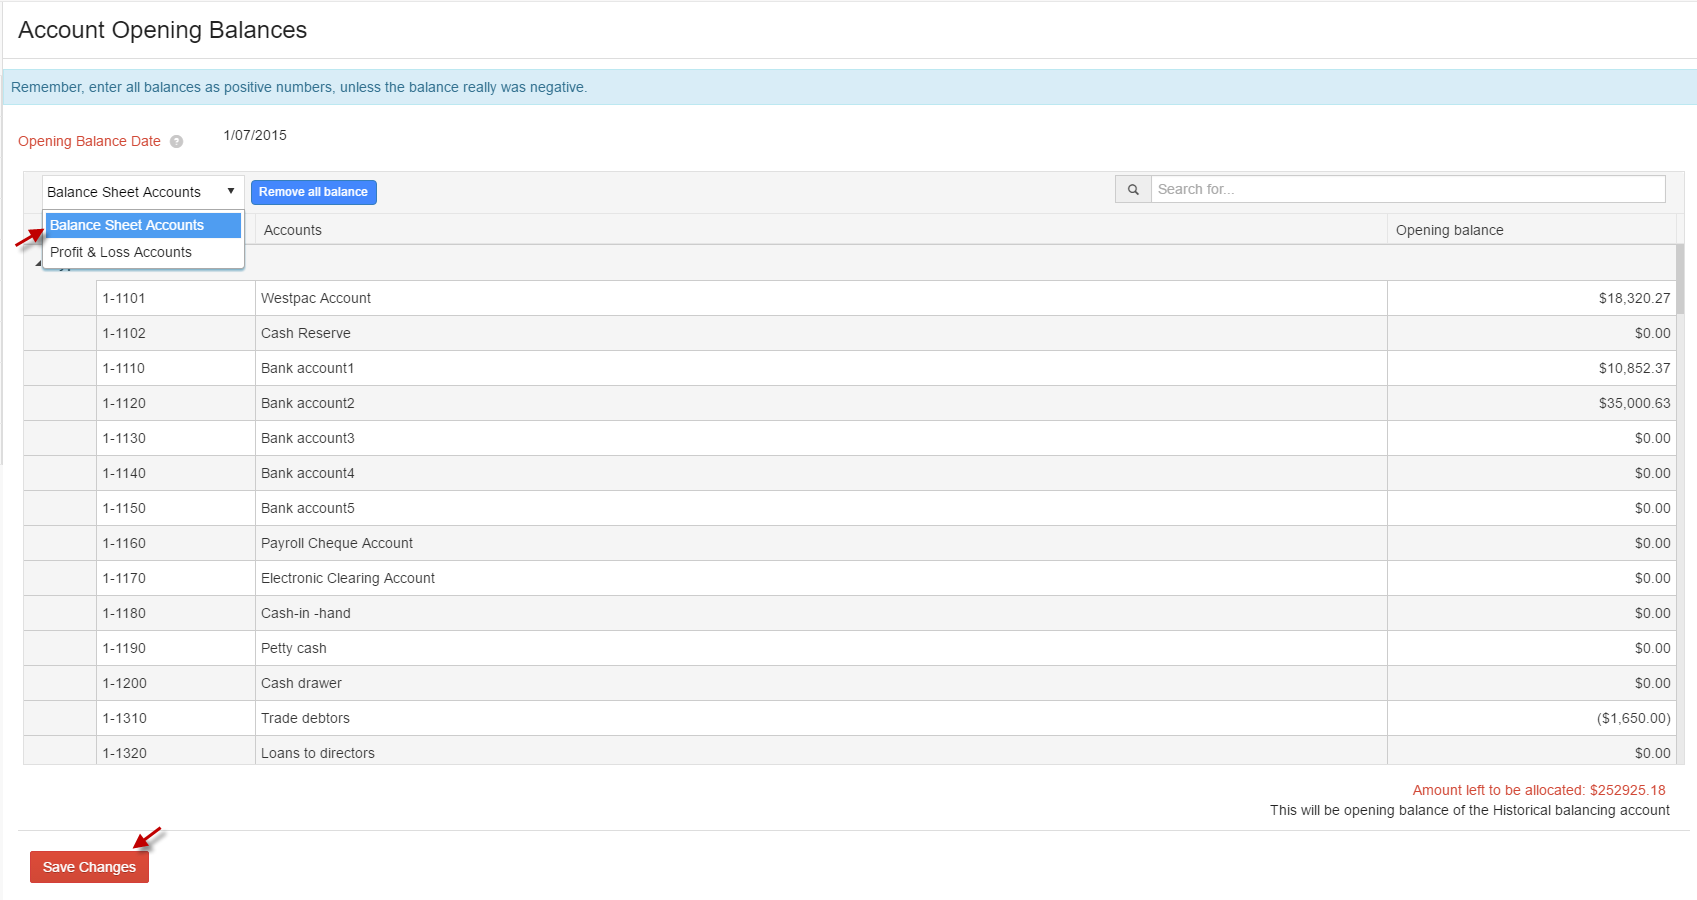
While migrating from existing accounting software to IAM, you need to ensure that the transition is flawless, that all prevailing data such as journal entries, records, expense and income statements etc., has been recorded and continuity in financial statements is maintained. To ensure this, an opening balance needs to be calculated.
IAM provides predefined list of accounts, which needs to be filled in to get the opening balance.
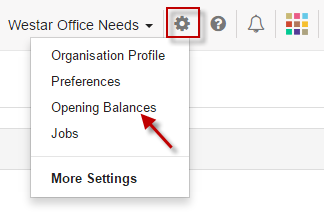
Click Opening Balance option from Settings icon.
Enter values in relevant accounts and click Save Changes.
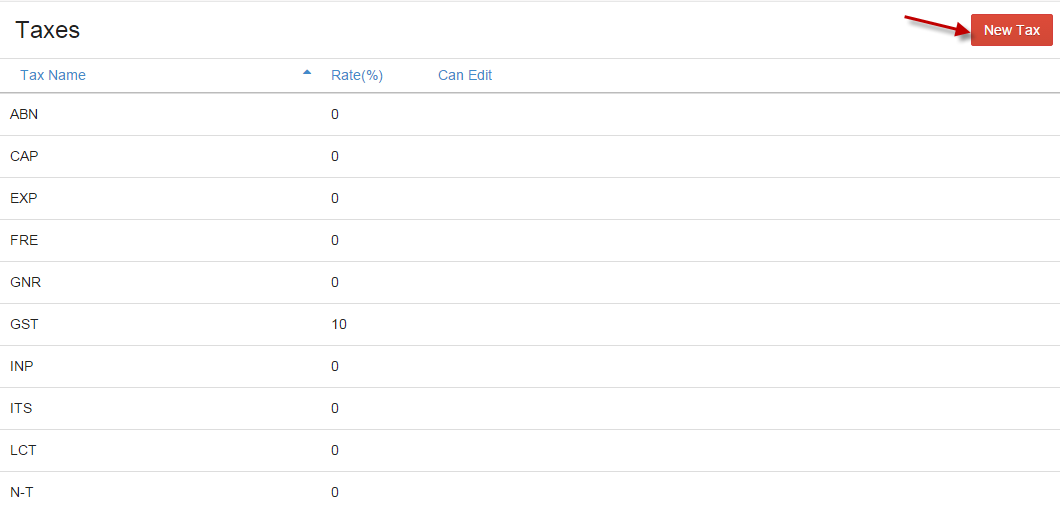
Taxes
Your business' financials are affected by regulatory taxes and each organization has different country specific taxes to adhere to. You can edit or add further Taxes through the Settings section.
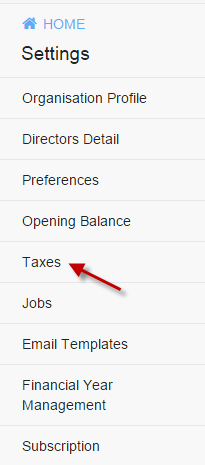
Click More Settings from Settings icon and click Taxes.
Click New Tax to add new tax.
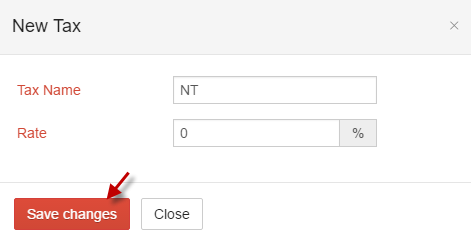
Enter Tax Name, Rate and click Savechanges.
To edit tax, select the required tax, enter details and click Save changes.
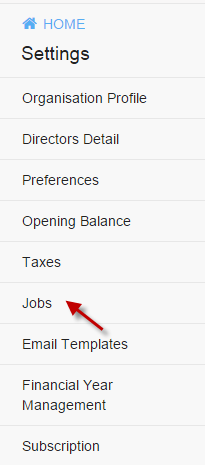
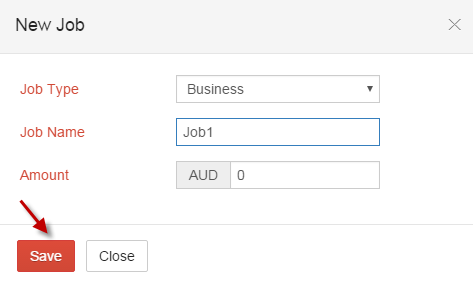
Jobs
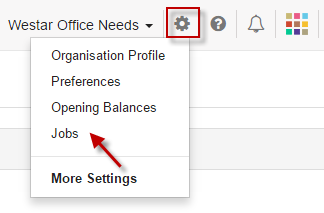
Click More Settings from Settings icon and click Jobs.
Create New Job by selecting New Job and Save.


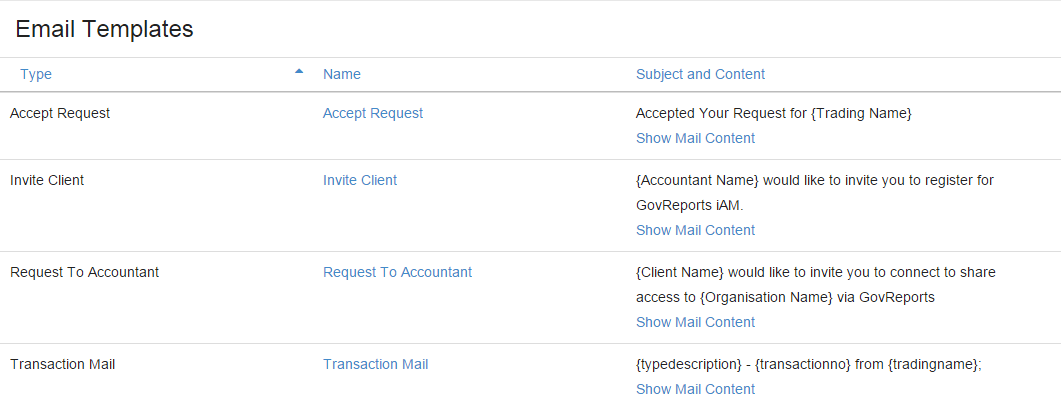
Email Template
Choose and customize text changes in Email Templates.
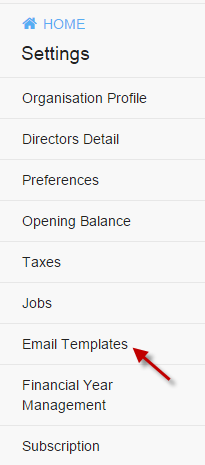
Click Show Mail Content and click customize the changes and click Save.
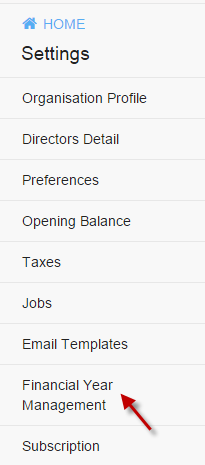
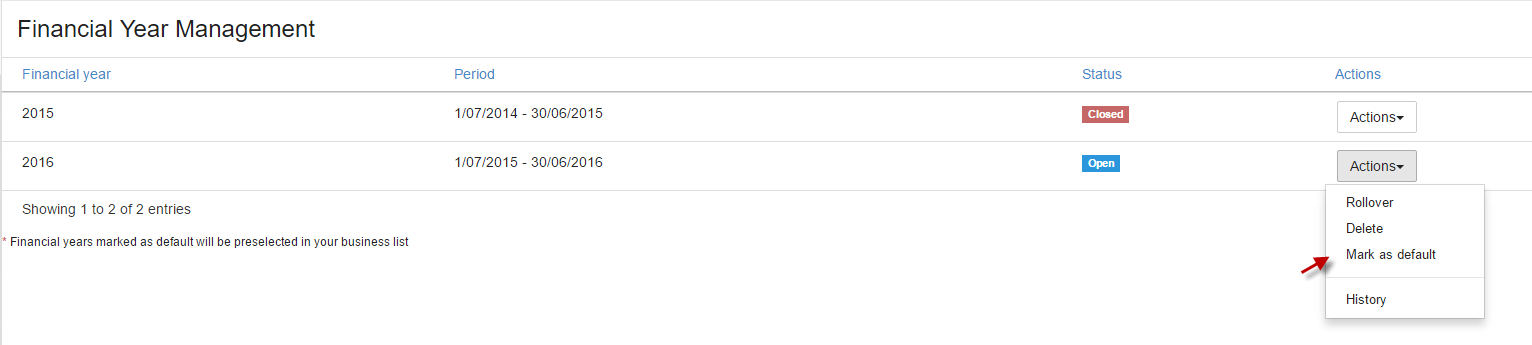
Financial Year Management
View all the Financial Year created for that particular Organisation by selecting Financial Year Management from More Settings.
-
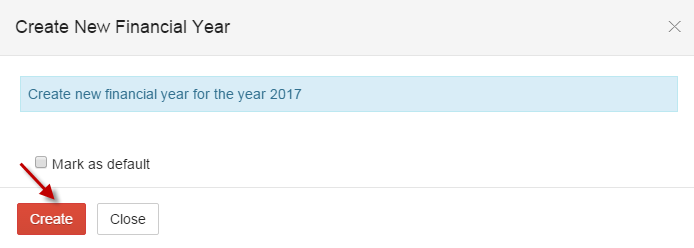
ADD New Financial year
Select add to add new financial year and click Create. This function is used only for creating new financial year without prior year's transactions.

We can set particular financial year as default.
-
More
-
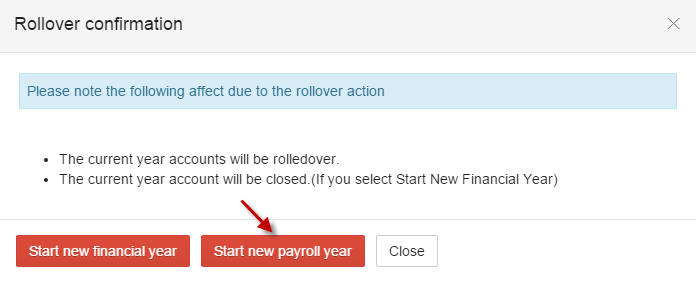
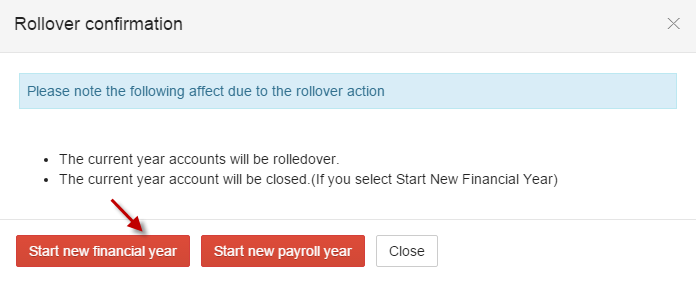
A. Rollover
IAM provides you to do rollover by selecting Rollover from More.

-
i. Start New Payroll Year
It will close the accounts and new year will be created. Allows to create/edit/delete transactions in closed financial year.
-
ii. Start New Financial year
It will close the accounts and New Year will be created. Don't allow to create/edit/delete transactions in closed financial year.

-
i. Start New Payroll Year
-
B. Reopen
To reopen a closed financial year, click Reopen from More.

-
C. Mark as Default
You can choose your default financial year by selecting Mark as default from More.
-
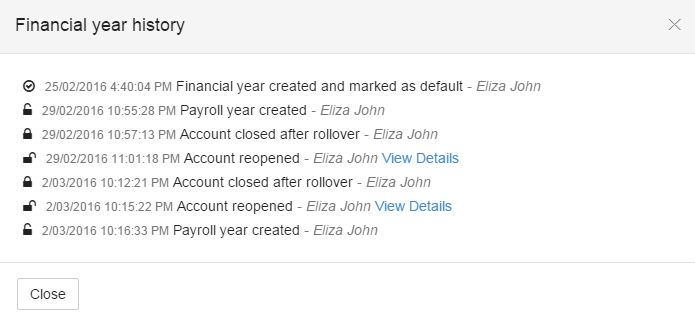
D. History
View the history details of the specific financial year by selecting History from More.
-
A. Rollover
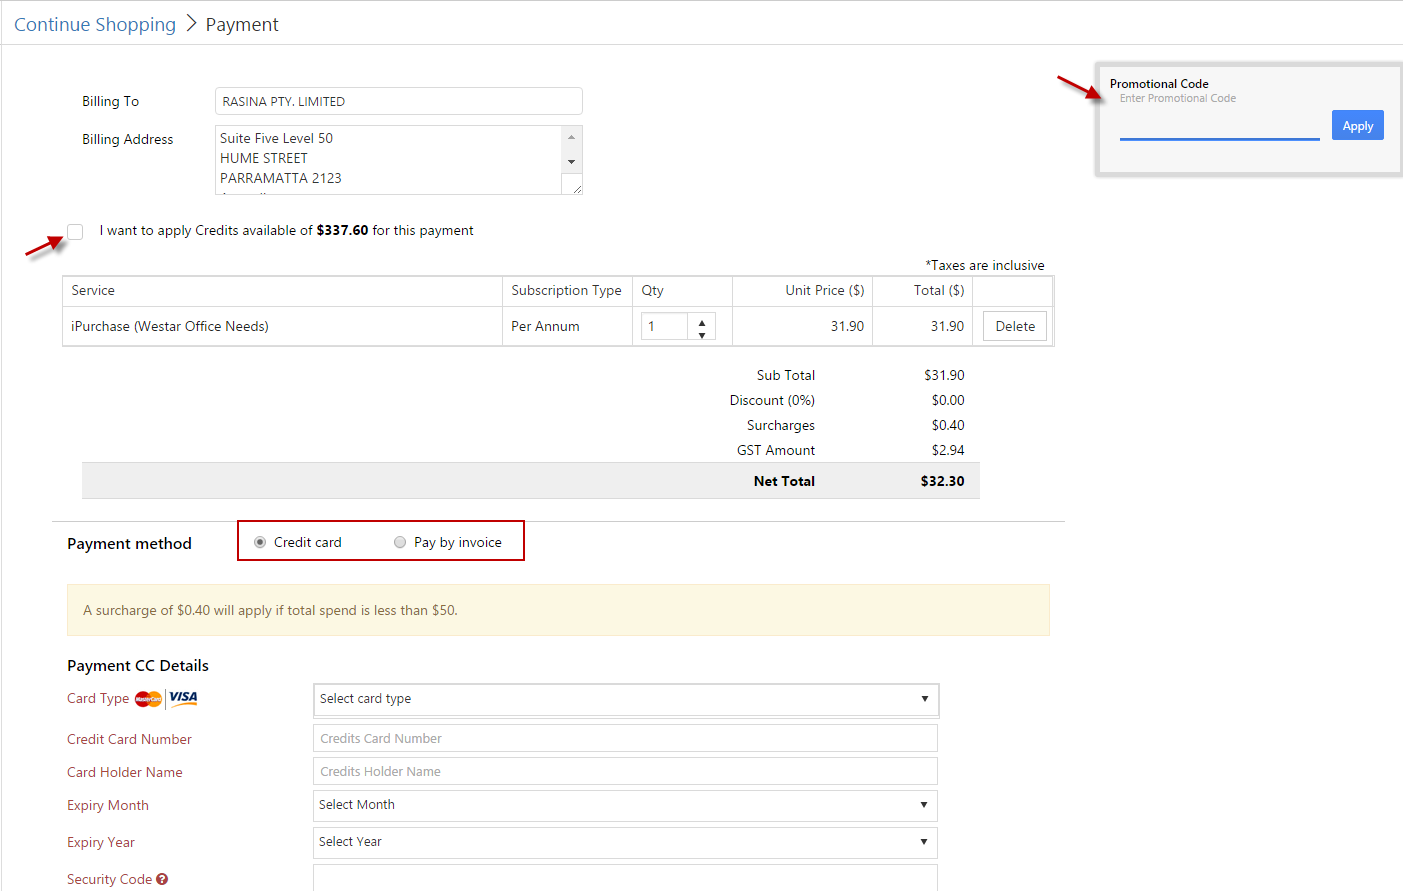
Subscription
Select More Settings from Settings icon and click Subscription.
Here, you can purchase the desired module by selecting Purchase option.
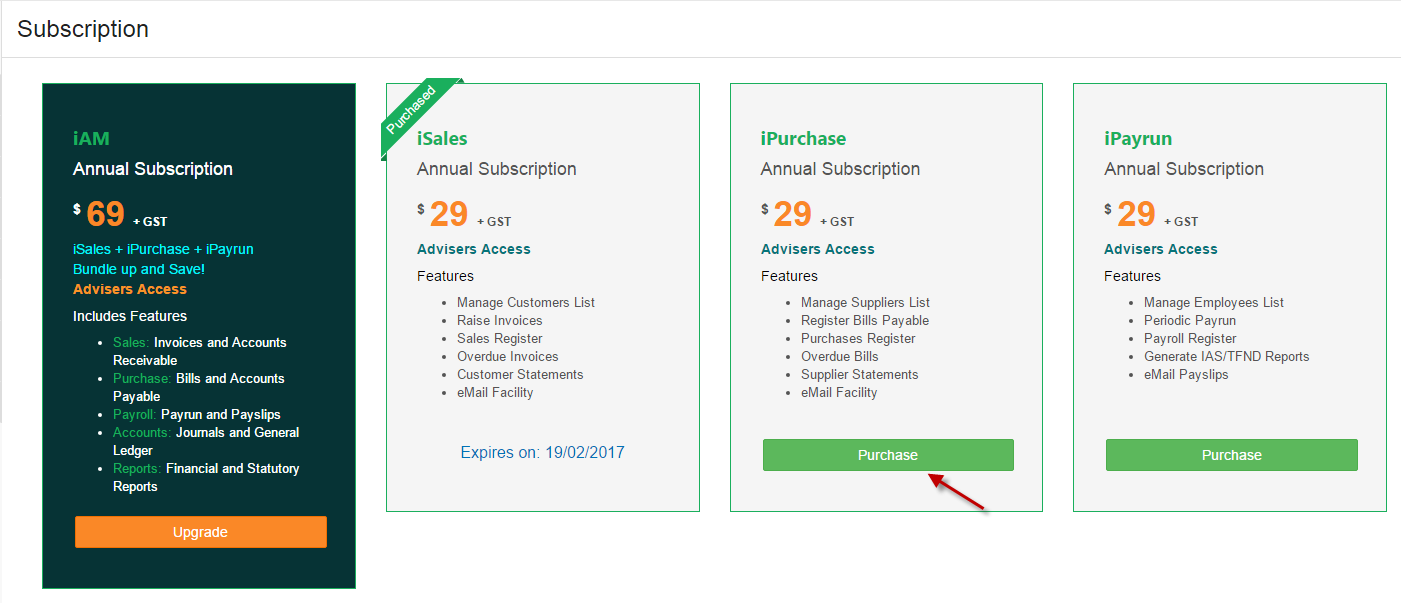
Payment needs to be done for the selected module with any one of the payment methods as follows,
- i. Credit card – Use credit card for your payment
- ii. Pay by invoice – Direct deposit via billing
- iii. Promotional Code – Enter promotional code (if you have any) and can utilize discounts for your purchase.
-
iv. Available Credits – You can utilize your available credits and can purchase module.
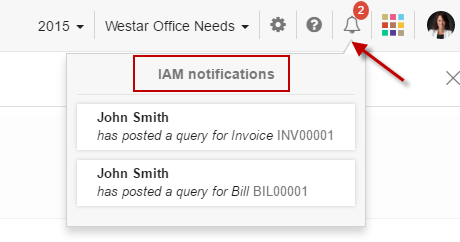
Notifications
IAM Notification will be received when a query is posted to you for any transaction/ when your query is being replied.
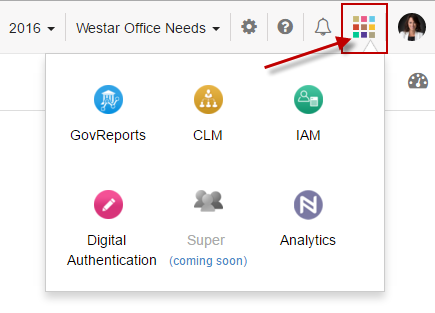
Application Grid
Easily get access to various applications by selecting the required app from the application grid.
-
GovReports
GovReports is an online SBR lodgment portal for businesses, accounting and tax professionals. Lodgment software to help BAS and Tax Agents and Payroll Professionals to lodge Business Activity Statements, PAYG Annual Summaries, Tax File Number Declaration Forms and ASIC Forms. It is the optimal solution for automating the process of completing and lodging hundreds of government forms easily. It is specifically designed to lodge reports with SBR-ready government agencies using an internet browser from anywhere, anytime, with any device.
Read more
-
CLM –Client & Lodgment Manager
Client & Lodgment Manager is designed for businesses, accountants, bookkeepers and tax agents to efficiently manage their practices. Spend less time customizing and more time moving your practice to the cloud. With CLM you can quickly set up your office and get started with your work. You can easily manage all client information, create jobs, attach a checklist, assign tasks, and track progress.
Read more
-
Digital Authentication
Digital Authentication is the optional service that validates the authenticity and integrity of a document online with digital signature. GovReports Digital Authentication increases the productivity with accessibility and assist to speed up the legal and compliance process, enabling for document issuers to electronically send documents for review and authorization by the document receivers anywhere, any time on any device.
Read more
-
Analytics
Business Analytics is a financial reporting and analysis tool which helps you in monitoring business performance, spotting business trends and identifying areas to improve upon.
Read more
User
- My Account – My Account is common for other applications in app grid.
- Account Settings – Helps in managing GovReports Account Profile, Personal Access allocations and Change Password.
- Manage My Account – Manage your relationships with GovReports including Purchases, Transaction History, Subscriptions, Billing and Shopping Cart.
- AUSkey Settings – Manage your AUSkey, Software Nomination and related Securities.
- Sign out – Allows signing out from your account.